Make A Mask For Healthcare Workers
Call For Help
A few days ago, I received an email from a fellow high school robotics team member. Her father is a serving healthcare soldier in the US military, stationed in Okinawa, Japan. They, like many other hospitals, face a shortage of basic medical supplies to protect themselves and their patients from spread of the Wuhan Coronavirus. In the email, she states that her family had spent the past weekend sewing mask filters for her father’s hospital. She also mentioned that there were a group of doctors at the Billings Clinic that had developed a maker friendly 3D printable reusable mask that may help limit the spread of Covid-19 to doctors.
Call To Action
Do you have a 3D printer? Do you know people in the healthcare profession? Want to do something other than listen to all the bad news on TV or Youtube? Spend some time with your children and print this mask.
A bit of empowerment will lift the spirits of your family, and you will potentially help healthcare workers stay well while they help others. I cannot vouch for the efficacy of this mask, but if it’s good enough for the doctors that came up with it…some protection has to be better than nothing.
What We Did
Maybe you ordered a 3D printer as a curiosity and never much used it, or maybe your kids are crafty but you have never taken the same interest, now is the opportunity to make it do something useful. We have a cheap-o Anet A5 3D printer.

It took a little over 3 hours to print one mask and 1.5 hours to print 3 filter inserts. Our printer had no problems with these prints and no supports were required.
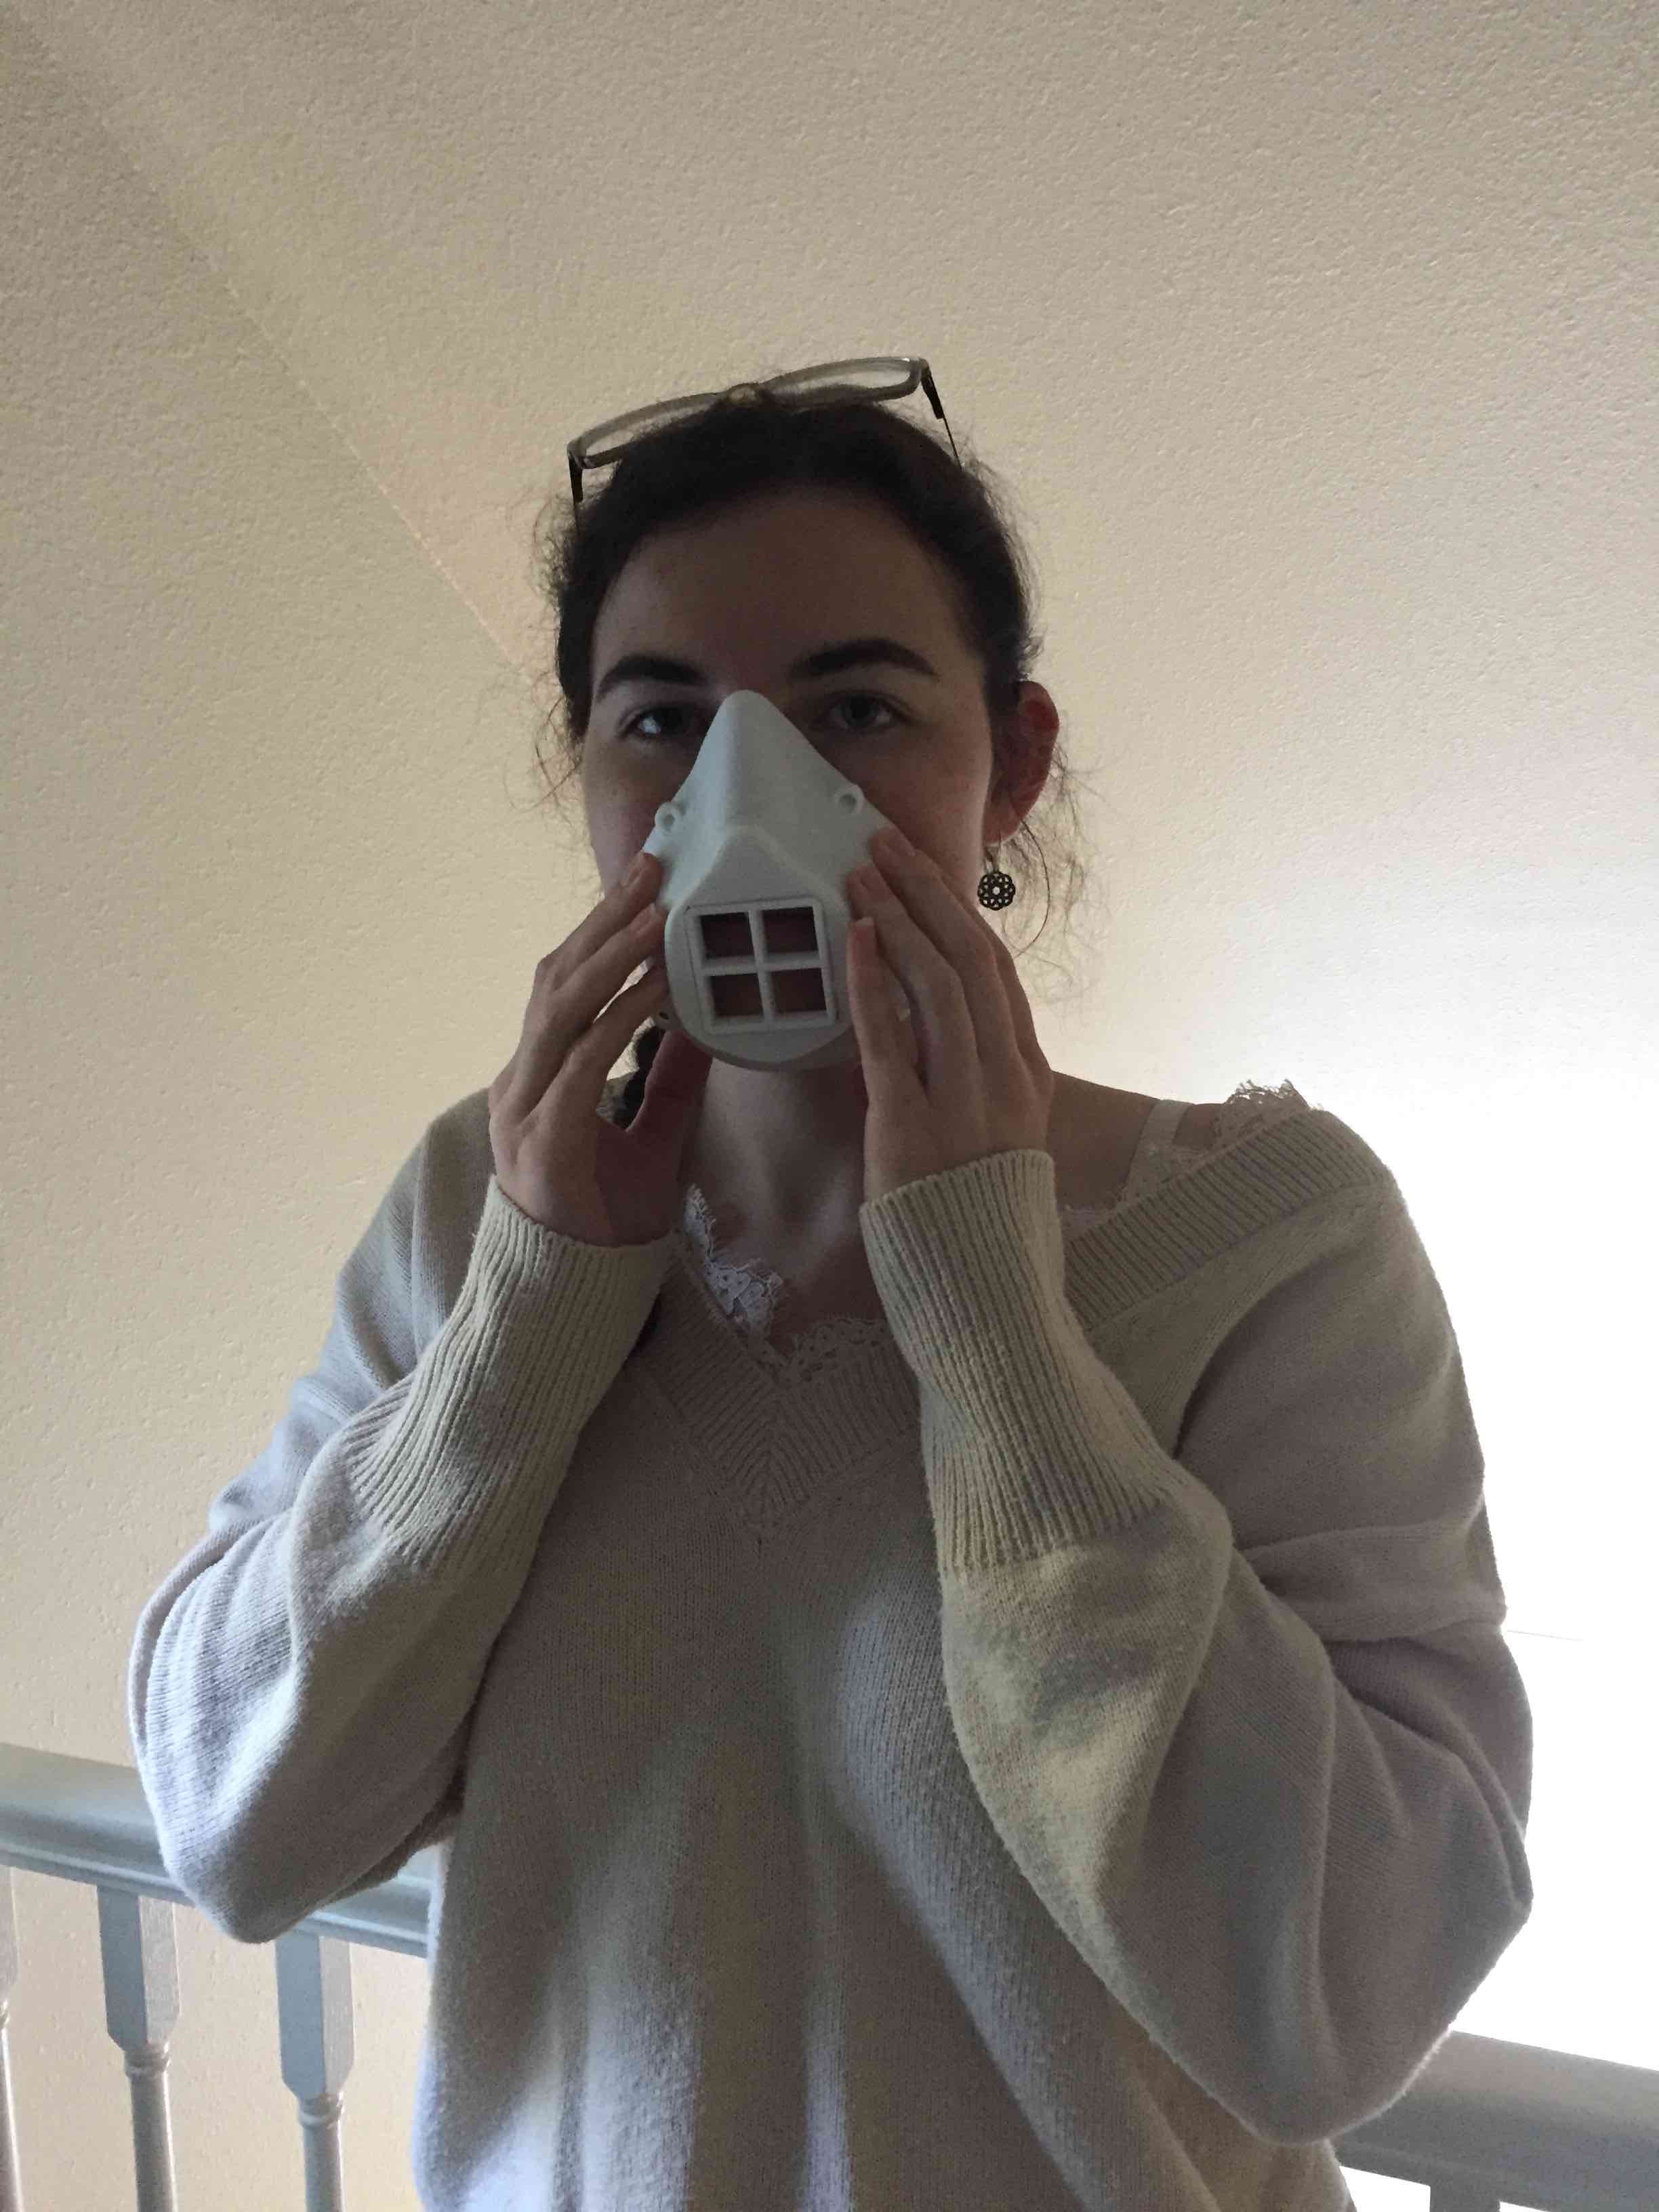
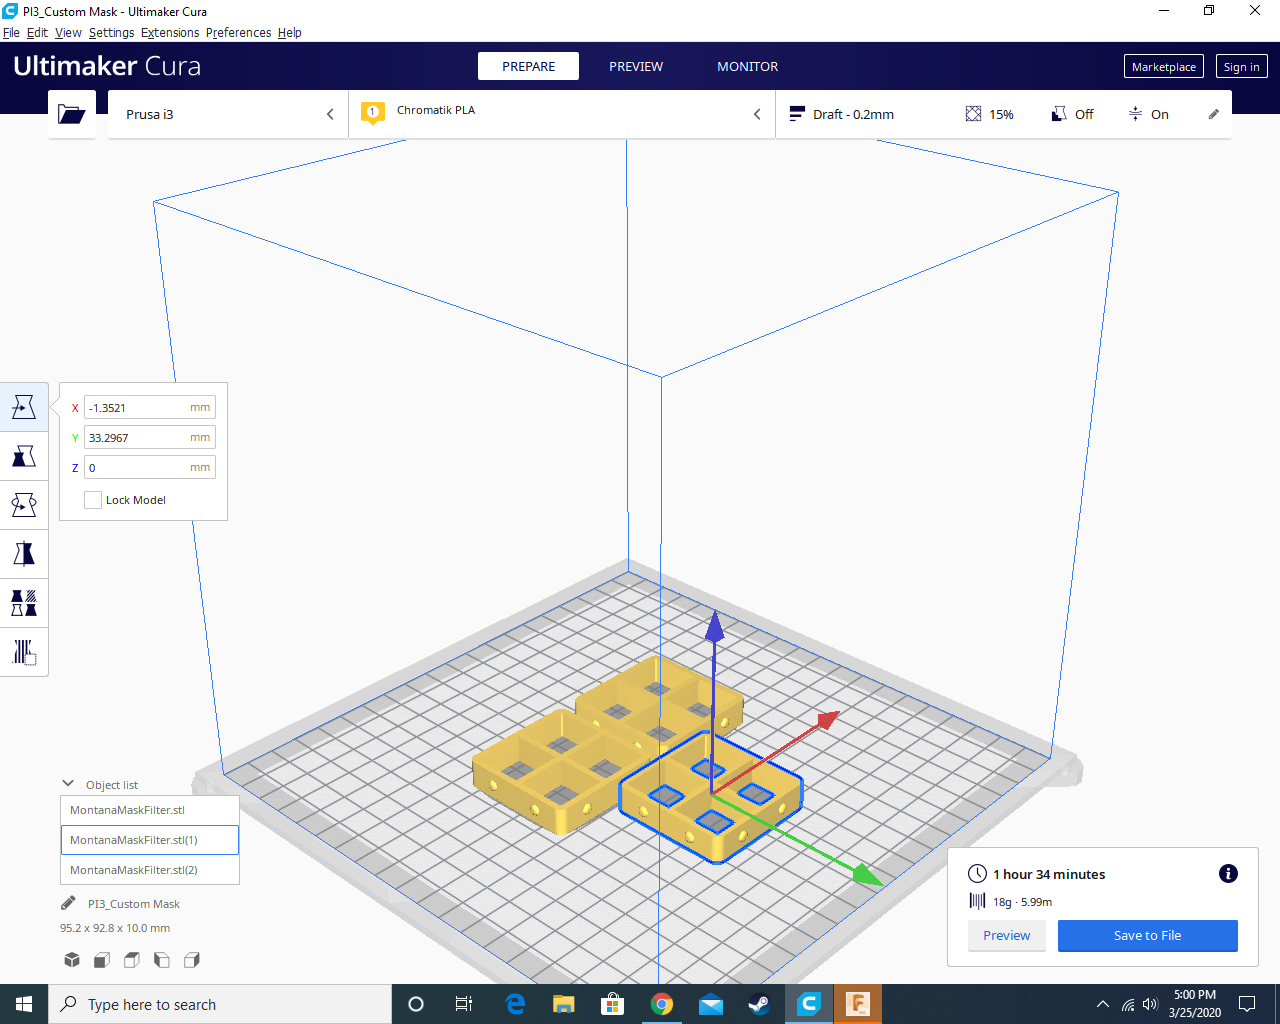
First, we downloaded the link to Billings Clinic 3D mask STL zip file and unzipped the file. Inside the zip file are two STL files…one named MontanaMask.stl and the other MontanaMaskFilter.stl. These files are ready to use for most 3D printer pre-processing software as is. We use Ultimaker Cura and each STL loaded without issue. My daughter replicated the filter inserts three times and put them fairly close together with a 0.25 in brim so that they would lift off the bed together.
Next, we imported the mask and rotated the front part of the mask downward to sit flush with the bed.
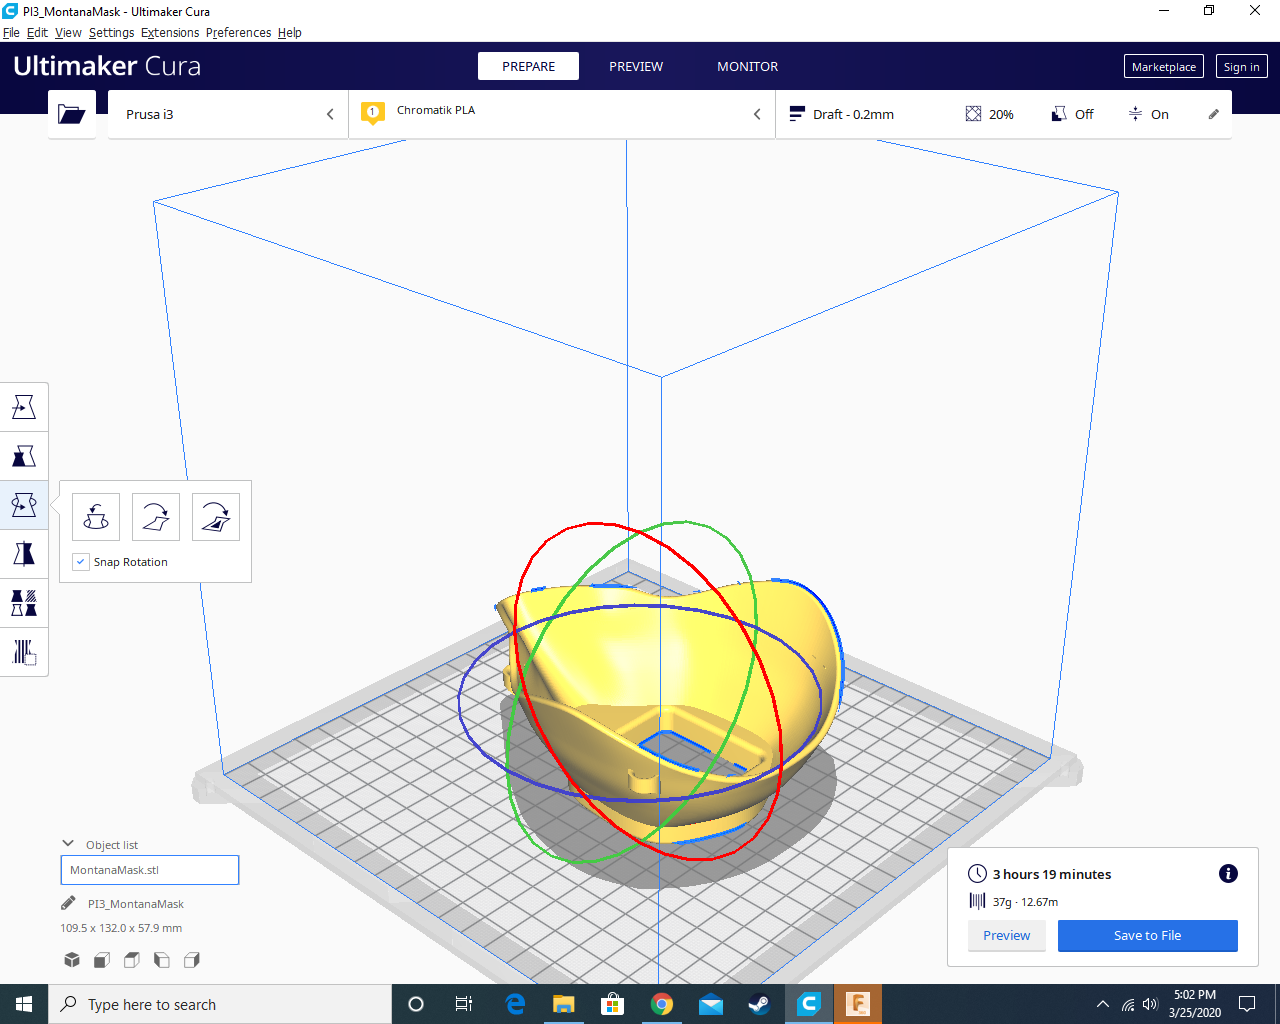
We loaded and printed with 1.75mm PLA (both white and black…what we had on-hand). We heated the bed to 60 degrees C and set the extruder temp to 205 degrees. We used both 15 and 20% infill and it did not seem to speed up the print much. But we did use a draft layer of layer height of 0.2mm (draft setting in cura) and that, vs. the fine setting (0.1mm layer height), cut the time from 8+ hours to 3.5 hours. The quality seemed fine.
Finally, a 0.25 inch brim was added to the print. I always use some glue-stick on our print bed for adhesion. That, combined with a brim, produces reliable prints that stick to the bed, won’t knock off due to bed movement, but make the print easy enough to release with a plastic scraper under the brim. All other settings in cura we left to the defaults for our printer.
I was a great feeling to hand these over. Give it a try!
Spread the Word
If you found this information helpful, I would appreciate a kind mention.
Click to Tweet (you may edit before posting.)
 XRPTipBot tips appreciated too!