Easy Jekyll Github Pages Blog With Docker
The other day, I showed my daughter the new blog I created. She is on the robotics team in college and expressed an interest in starting her own. My blog is based on the Jekyll static website generator. While I know HTML, Javascript, Ruby, devops, and all the rest, I did not want to deal with all that just to get a blog site up. And I am also cheap. I learned just the other day (ok, it is not new news, but it was to me) that one can host a website through Github Pages, and that it supports Jekyll generated sites, automatically. This was my ticket. I threw a blog site together quickly and content is growing fast.
But as I started writing down the content for the prerequisites even to provide a minimal environment to get her up and running (she is not a software engineer), I realized it was still too heavy. She got the notion of markdown, creating posts, github, checking in and out, etc. But when I started taking about installing editors, Ruby, gems, bundler, etc…I could see her eyes glaze over.
So I started building a docker container to combine VSCode and Jekyll into one authoring environment. After getting back on the horse with docker (it has been some time since I used it), I realized that both Jekyll and VSCode docker images already exist. And I really did not need to combine images into one environment. All that is really needed is docker-compose’ed images pointing to a local jekyll project site. Jekyll and docker-compose got me started (many thanks to Matthias Lischka).
Creating A Jekyll/Github Pages Authoring Environment
I am going to describe how you can get the Jekyll static site generator and VSCode editor up and running to build a skeleton site, published on Github Pages, with no install (other than Docker).
Step 1: Install Docker
The computer I wanted to try this on was a Windows 10 Home Edition machine. No Ruby, no development environment installed. So I downloaded the Docker Desktop for Windows package. It is now almost 1GB in size! Can you say bloat? I thought docker was light-weight; after running it, I found out that it does not support Windows 10 Home. Arg!
Not to fear, docker provides a compatible solution called Docker Toolbox for “older systems”. I love it how Windows 10 Home is now already old. The installation instructions are here, but the most important thing you need to know is that your machine needs to support virtualization. This is a hardware feature found in newer CPUs and must be first enabled in the system’s BIOS settings. When I first turn my computer on, I hit the Del key and that brings me into my BIOS settings. Here is my screen showing that virtualization is turned on (YMMV):

You may have to fish around the menus to find the setting.
Download the latest DockerToolbox-*.exe file. The location is artfully hidden in the docker toolbox writeup. Run the executable and take all the defaults.
Once complete, there should be a new desktop item called “Docker Quickstart Terminal”. Run this, and wait…you should see this:
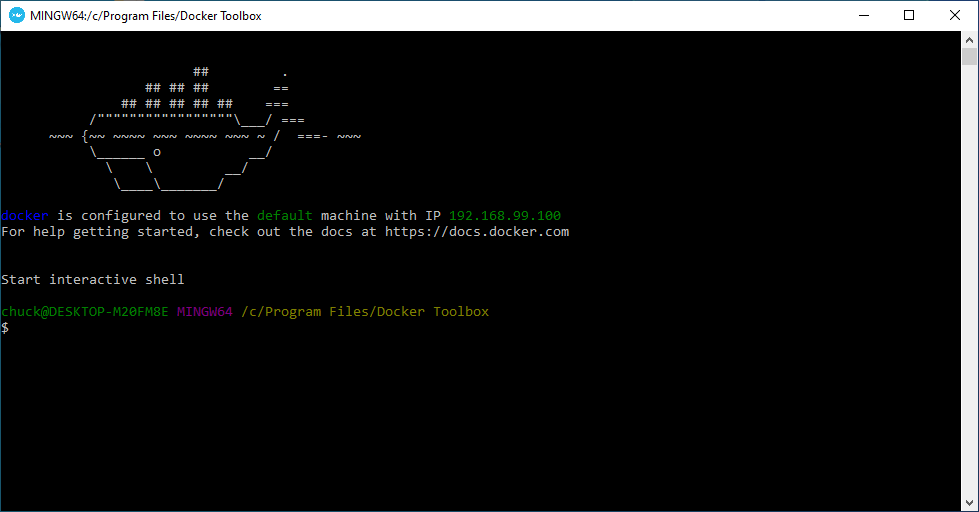
Note the number where it says “machine with IP” (in my case 192.168.99.100)”. You’ll need it later.
Step 2: Create A Project Directory And docker-compose.yml File
Now create a my-blog directory inside your Documents directory. Inside my-blog, create a new file with the following:
version: '3'

services:
  jekyll:
    image: jekyll/jekyll:latest
    command: jekyll serve --watch --force_polling --verbose
    ports:
      - 4000:4000
    volumes:
      - .:/srv/jekyll

  vscode:
    image: codercom/code-server
    command: --auth none
    ports:
      - 8080:8080
    volumes:
      - .:/home/coder/project
Step 3: Generate Starter Website
Go to your docker command prompt window and execute:
cd /c/Users/(your user name)/Documents/my-blog
Next, execute:
docker-compose run jekyll bash
You should see another prompt like bash-5.0#.
Now execute:
jekyll new . --force
You should see at the end (it takes longer than it seems it should…be patient):
New jekyll site installed in /srv/jekyll.
Type exit.
Step 4: Access Development Website and VSCode Editor
Now you have a starter blog website. Next, you will start up a development web server and the VSCode editor where you can author and publish new blog content. Never fear…it is a one-liner:
docker-compose up
Again, after some more waiting, you should see:
vscode_1  | info  Server listening on http://0.0.0.0:8080
vscode_1  | info    - No authentication
jekyll_1  | ruby 2.6.5p114 (2019-10-01 revision 67812) [x86_64-linux-musl]
jekyll_1  |   Logging at level: debug
jekyll_1  |     Jekyll Version: 4.0.0
jekyll_1  | Configuration file: /srv/jekyll/_config.yml
jekyll_1  |   Logging at level: debug
jekyll_1  |     Jekyll Version: 4.0.0
jekyll_1  |              Theme: minima
jekyll_1  |       Theme source: /usr/local/bundle/gems/minima-2.5.1
jekyll_1  |          Requiring: jekyll-feed
jekyll_1  |          Requiring: jekyll-seo-tag
jekyll_1  |          Requiring: jekyll-feed
jekyll_1  |             Source: /srv/jekyll
jekyll_1  |        Destination: /srv/jekyll/_site
jekyll_1  |  Incremental build: disabled. Enable with --incremental
jekyll_1  |       Generating...
jekyll_1  |        EntryFilter: excluded /Gemfile
jekyll_1  |        EntryFilter: excluded /Gemfile.lock
jekyll_1  |            Reading: _posts/2020-03-31-welcome-to-jekyll.markdown
jekyll_1  |        Jekyll Feed: Generating feed for posts
jekyll_1  |         Generating: JekyllFeed::Generator finished in 0.002465814 seconds.
jekyll_1  |          Rendering: _posts/2020-03-31-welcome-to-jekyll.markdown
jekyll_1  |   Pre-Render Hooks: _posts/2020-03-31-welcome-to-jekyll.markdown
jekyll_1  |   Rendering Liquid: _posts/2020-03-31-welcome-to-jekyll.markdown
jekyll_1  |   Rendering Markup: _posts/2020-03-31-welcome-to-jekyll.markdown
jekyll_1  |   Rendering Layout: _posts/2020-03-31-welcome-to-jekyll.markdown
jekyll_1  |      Layout source: theme
jekyll_1  |          Rendering: _posts/2020-03-31-welcome-to-jekyll.markdown/#excerpt
jekyll_1  |   Pre-Render Hooks: _posts/2020-03-31-welcome-to-jekyll.markdown/#excerpt
jekyll_1  |   Rendering Markup: _posts/2020-03-31-welcome-to-jekyll.markdown/#excerpt
jekyll_1  |          Rendering: 404.html
jekyll_1  |   Pre-Render Hooks: 404.html
jekyll_1  |   Rendering Markup: 404.html
jekyll_1  |   Rendering Layout: 404.html
jekyll_1  |      Layout source: theme
jekyll_1  |          Rendering: about.markdown
jekyll_1  |   Pre-Render Hooks: about.markdown
jekyll_1  |   Rendering Markup: about.markdown
jekyll_1  |   Rendering Layout: about.markdown
jekyll_1  |      Layout source: theme
jekyll_1  |          Rendering: index.markdown
jekyll_1  |   Pre-Render Hooks: index.markdown
jekyll_1  |   Rendering Markup: index.markdown
jekyll_1  |   Rendering Layout: index.markdown
jekyll_1  |      Layout source: theme
jekyll_1  |          Rendering: assets/main.scss
jekyll_1  |   Pre-Render Hooks: assets/main.scss
jekyll_1  |   Rendering Markup: assets/main.scss
jekyll_1  |          Rendering: feed.xml
jekyll_1  |   Pre-Render Hooks: feed.xml
jekyll_1  |   Rendering Liquid: feed.xml
jekyll_1  |   Rendering Markup: feed.xml
jekyll_1  |   Rendering Layout: feed.xml
jekyll_1  |          Rendering: assets/main.css.map
jekyll_1  |   Pre-Render Hooks: assets/main.css.map
jekyll_1  |   Rendering Markup: assets/main.css.map
jekyll_1  |            Writing: /srv/jekyll/_site/404.html
jekyll_1  |            Writing: /srv/jekyll/_site/about/index.html
jekyll_1  |            Writing: /srv/jekyll/_site/index.html
jekyll_1  |            Writing: /srv/jekyll/_site/assets/main.css
jekyll_1  |            Writing: /srv/jekyll/_site/feed.xml
jekyll_1  |            Writing: /srv/jekyll/_site/assets/main.css.map
jekyll_1  |            Writing: /srv/jekyll/_site/jekyll/update/2020/03/31/welcome-to-jekyll.html
jekyll_1  |                     done in 1.002 seconds.
jekyll_1  |          Requiring: jekyll-watch
jekyll_1  |            Watcher: Ignoring (?-mix:^_config\.yml)
jekyll_1  |            Watcher: Ignoring (?-mix:^_site\/)
jekyll_1  |            Watcher: Ignoring (?-mix:^\.jekyll\-cache\/)
jekyll_1  |            Watcher: Ignoring (?-mix:^Gemfile)
jekyll_1  |            Watcher: Ignoring (?-mix:^Gemfile\.lock)
jekyll_1  |  Auto-regeneration: enabled for '/srv/jekyll'
jekyll_1  | [2020-03-31 19:45:03] INFO  WEBrick 1.4.2
jekyll_1  | [2020-03-31 19:45:03] INFO  ruby 2.6.5 (2019-10-01) [x86_64-linux-musl]
jekyll_1  | [2020-03-31 19:45:03] DEBUG WEBrick::HTTPServlet::FileHandler is mounted on /.
jekyll_1  | [2020-03-31 19:45:03] DEBUG unmount .
jekyll_1  | [2020-03-31 19:45:03] DEBUG Jekyll::Commands::Serve::Servlet is mounted on .
jekyll_1  |     Server address: http://0.0.0.0:4000/
jekyll_1  | [2020-03-31 19:45:03] INFO  WEBrick::HTTPServer#start: pid=1 port=4000
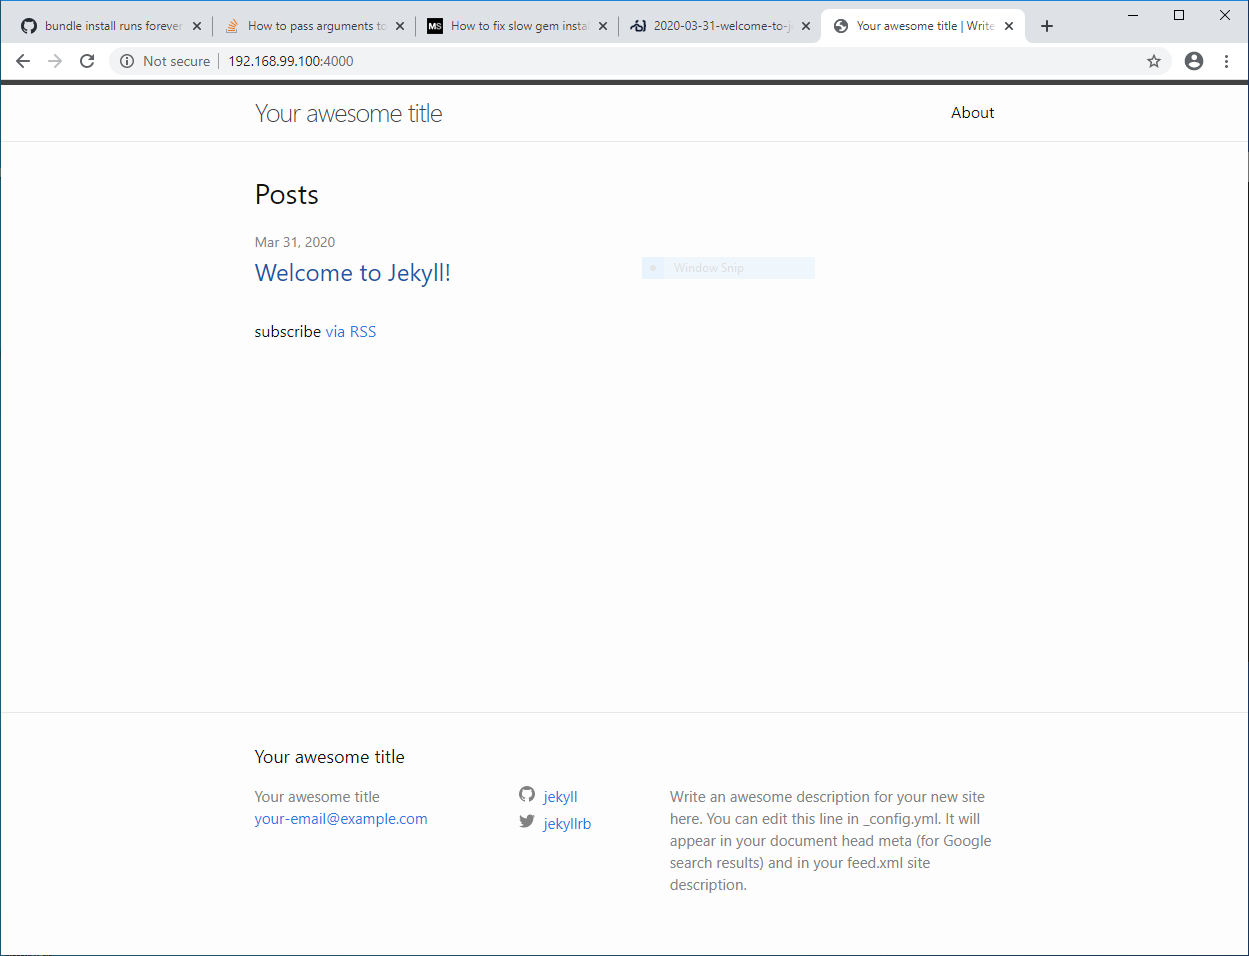
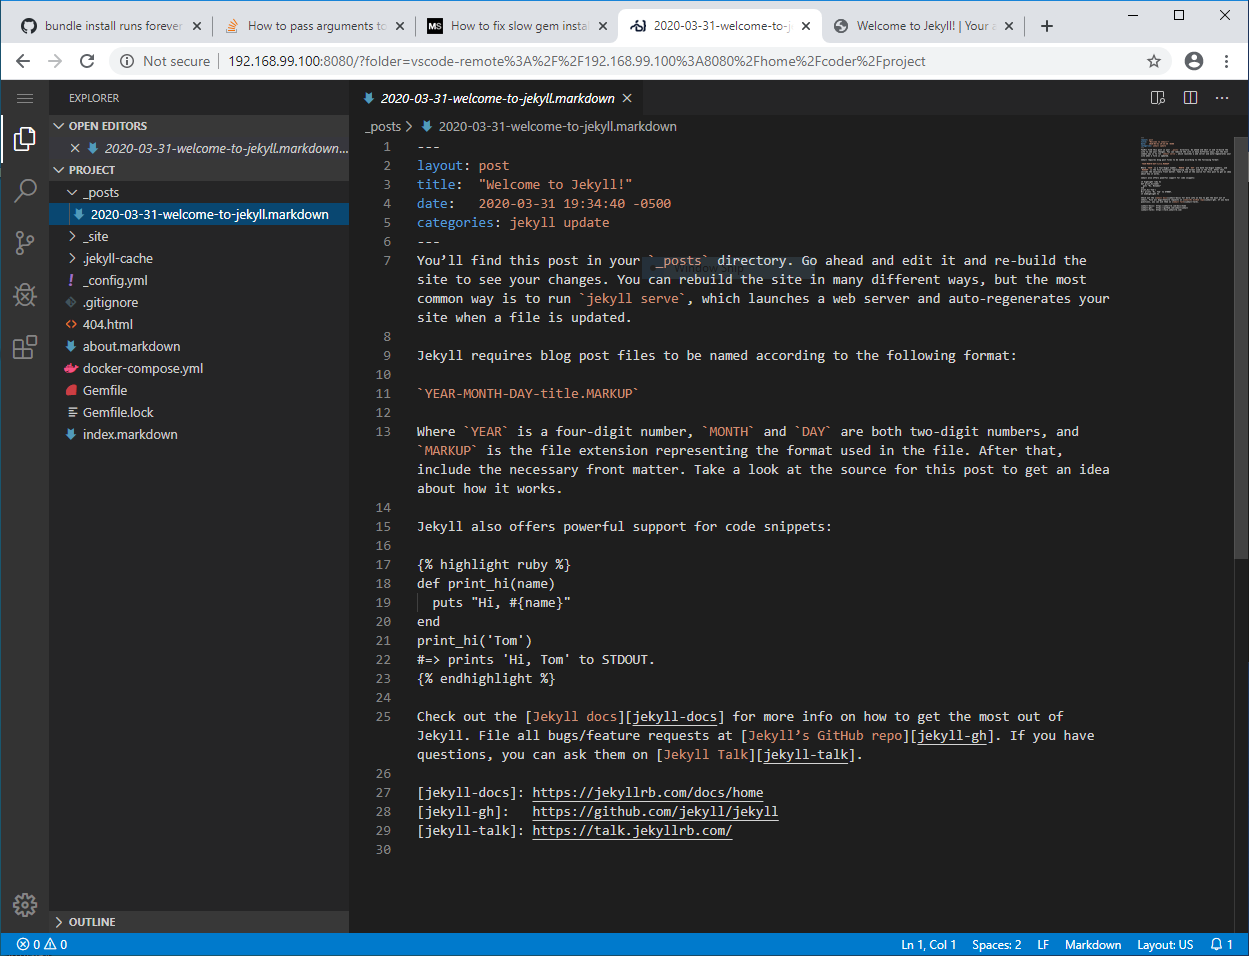
Now open a web browser, start two tabs, and navigate to http://192.168.99.100:4000 and http://192.168.99.100:8080. Note that the IP address of these URLs should match the IP address you saved off is step 1 (these examples are from my machine). You should see a skeleton blog site based on the minima theme and the VSCode editor.
In the VSCode editor window, click the Open folder... link and select project, click OK. You should see a file explorer on the left with your website files. The _posts directory contains your blog posts.
You’ll now want to learn more about crafting posts in your new site. An excellent video tutorial series is from Giraffe Academy. Start at lesson 5.
The nice thing about this setup is as you make changes to your website files in the VSCode editor, the local website automatically updates, allowing you see the results instantly.
Step 5: Publish Your Blog To Github
To get your blog site on the Internet, the basic steps are as follows:
Initialize a git repository in your local project
In VSCode, Ctrl-Shift-P (if there is only one command you learn in VSCode, this is it). Type git, select Git: Initialize Repository. Select project. Your project files should turn green and there should be a U beside most of them.
Add your website files to your local repository and commit
Click the Source Control icon on the left toolbar. Type initial commit in the message area and hit Ctrl-Enter.
Create a Github account if you do not already have one
Add a Github repository
Got to https://github.com/new or click the New button from your Github account. Name your repository username.github.io replacing username with your Github username. Do not check the Initialize this repository with a README checkbox.
Link your local repository to the newly created Github repository
Go back to VSCode. Ctrl-Shift-P (remember, the only sequence you need to know). Type git. Select Git: Add Remote. Type in https://github.com/username/username.github.io.git replacing both usernames with your Github username.
Push your changes
Ctrl-Shift-P. Type git push. Select Git: Push. Enter your Github credentials when prompted.
Step 6: Enjoy Your New Website
Go to http://username.github.io replacing username with your Github username. You should see your web site!
Spread the Word
If you found this information helpful, I would appreciate a kind mention.
Click to Tweet (you may edit before posting.)
 XRPTipBot tips appreciated too!