Embedded Java For Raspberry Pi Zero Setup On Windows 10 Hosts
I describe how to setup a Windows 10 PC to develop, build, and deploy an embedded hello world application for the Raspberry Pi Zero in Java. After performing the steps below, you can proceed to the post Embedded Java Hello World On Raspberry Pi Zero, which will enable you to build a simple application to blink the green ACT LED on the Pi Zero without an operating system.
These instructions rely on the Windows Subsystem for Linux (WSL). I used the Debian distribution. What is WSL you may ask?
The Windows Subsystem for Linux lets developers run a GNU/Linux environment – including most command-line tools, utilities, and applications – directly on Windows, unmodified, without the overhead of a virtual machine.
Instead of WSL, I would love to have all of the below encapsulated in a Docker container, but alas, there is no support for Windows COM/USB ports yet via Docker containers (as of this writing). Given that this demonstration uses a serial bootloader to send the Raspberry Pi image to the Pi over a serial port…well, no docker serial port support is a problem! Even worse would be having to install all this software natively on Windows. Yuck! WSL takes some of the pain away because of apt. And for those familiar with Linux, it opens up that world on Windows without a VM.
Prerequisites:
- A Windows 10 workstation. These procedures were tested with Windows 10 Home 10.0.17134.
- A USB Serial port cable like this one from Adafruit.
Step By Step
Step 1: Install Windows Native Software
- Install Windows Subsystem for Linux V1 (note V1, V2 will not work!).
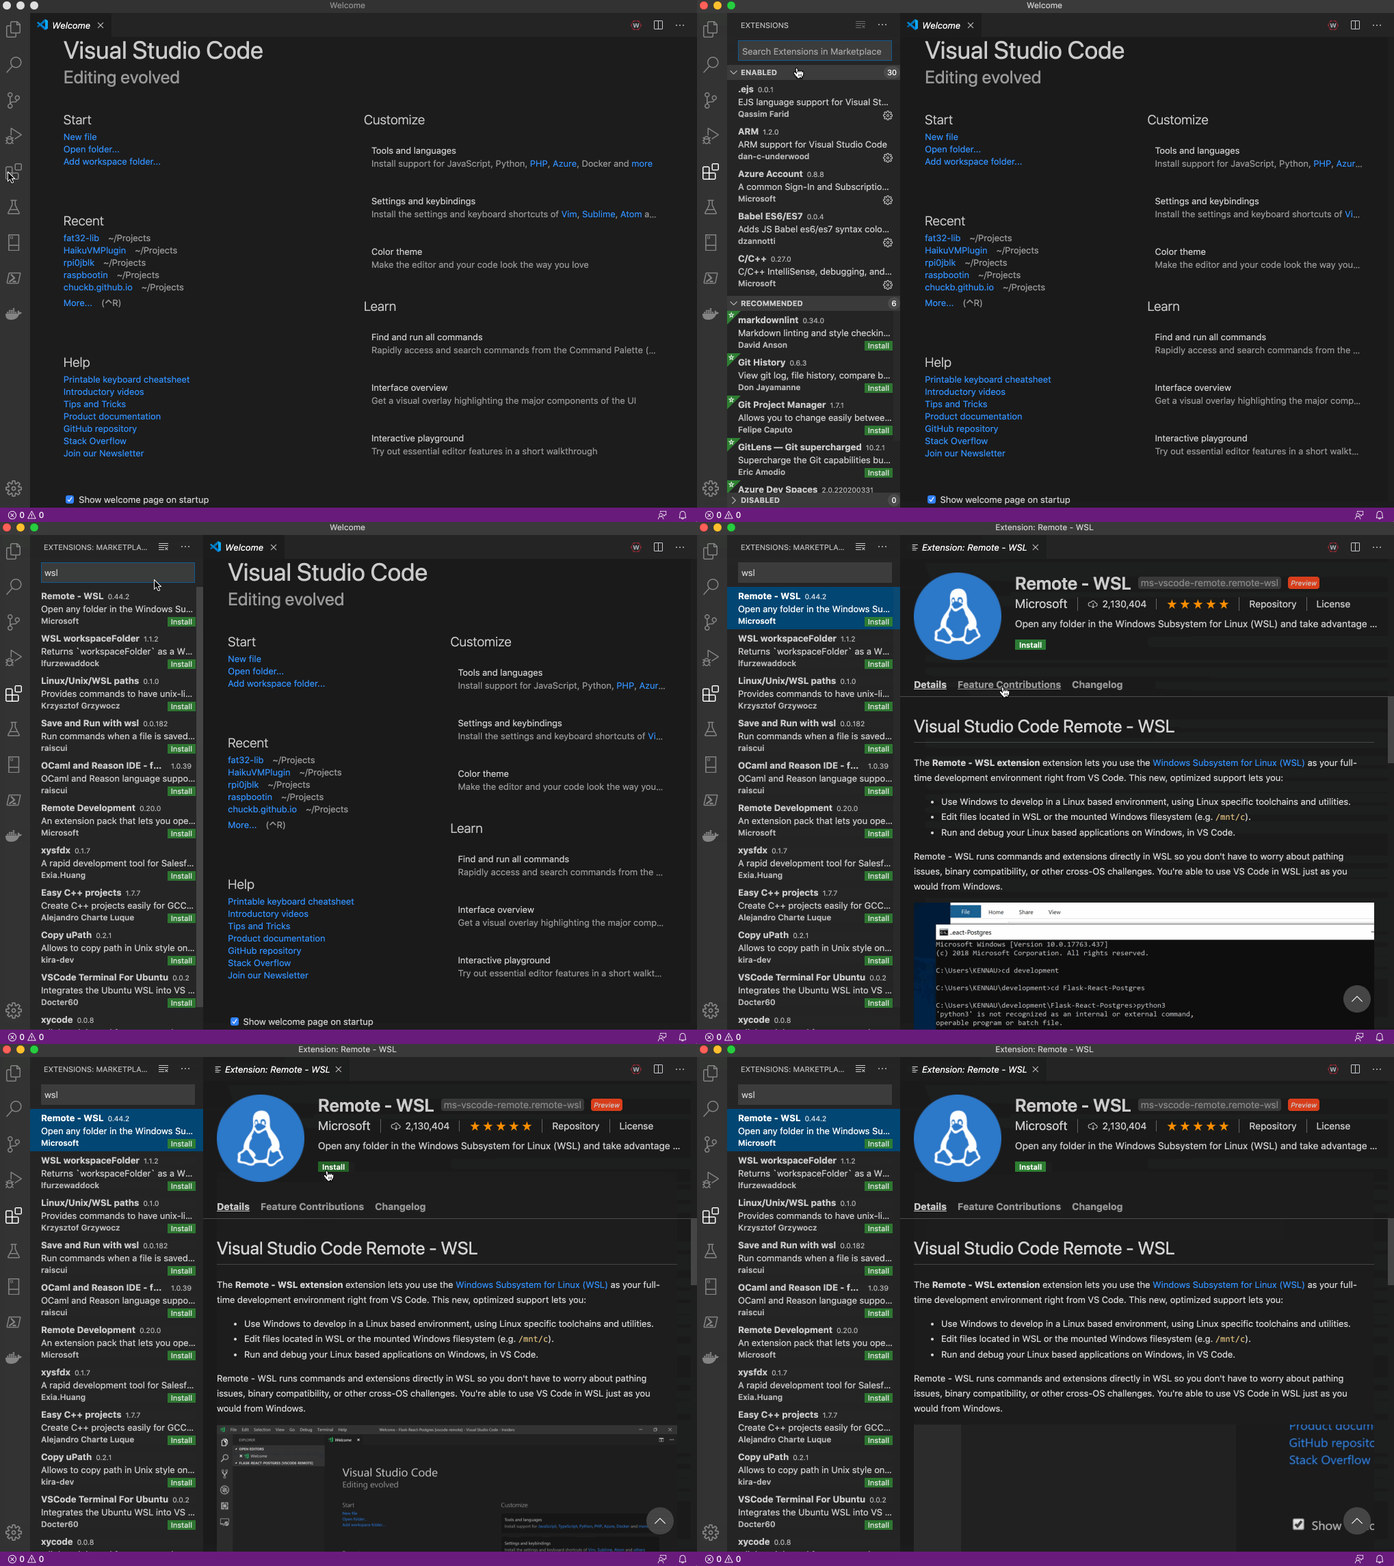
- Install VSCode on the Windows side, not within WSL. Run it. (This editor is optional but it does integrate nicely with WSL.)
- Install the Visual Studio Code Remote - WSL extension pack within Visual Studio.

- Close VSCode.
Step 2: Install WSL Software
- Open a WSL terminal (in Windows 10 Cortona search box, type wsl, then select wsl Run command).
- Install necessary build dependencies:
sudo apt-get updatesudo apt-get install openjdk-8-jdk gcc-arm-none-eabi build-essential gradle
Step 3: Set Up WSL Serial Port
- Open a Windows command prompt (not a WSL bash command prompt).
- Type
mode. Note all COM ports on your Windows system. - Plug in your USB serial port cable.
- Type
modeagain. Note a newly added COM port. In WSL, /dev/ttySx maps to COMx./dev/ttySxis the device that also should be placed in your projectbuild.gradlefile for thehaikuvm.portvariable. See linked blog post. - Go back to the WSL terminal.
- You need to set the permission of the port for the serial port bootloader program to access the USB serial device:
sudo chmod 666 /dev/ttySx
Step 4: Get VSCode Runnable From WSL
- Create a directory from Explorer in your Documents directory called
helloworld. - From the WSL terminal, change directory to
helloworld. Note that in WSL, the command would be something likecd /mnt/c/users/yourusername/Documents/helloworld - Run VSCode:
code . - Now you can proceed with the steps in the post Embedded Java Hello World On Raspberry Pi Zero
Differences For Deploying Pi Serial Bootloader Image to SD Card
Note that in the Mac-oriented related post, I document using the diskutil utility to determine which device is the SD card. This will not work within WSL, as diskutil is a Mac utility. Also note that removable media is not automatically mounted within WSL. So, you can do (assuming your inserted media shows up as drive D:):
sudo mkdir /mnt/d
sudo mount -t drvfs D: /mnt/d
Now when using the dd command (documented in related post), you will use /mnt/d as the volume to copy the image to. Be careful. DO NOT USE /mnt/c. You have been warned!
Embedded Raspberry Pi Java development on Windows with VSCode is now ready!
